
 This section will cover the following Topics:
1. Adding Data to Your Opticon Image Match Project
- Importing Your School Data
2. Printing Your Opticon Bar Codes
3. Shooting an OPS Opticon Image Match Order
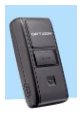
- Opticon Scanner
- Sync scanner and camera
- Photograph subjects
4. Post Photography
- Auto Matching Groups/Classes, or Teams to Individuals
- Recommended Workflow for Auto Group Matching
- Importing/Merging your Group Image Files
What is Opticon Image Match?
Opticon Match is a timestamping Bar Code scanning method that requires data to be loaded into your OPS Project. The project data must be a .CSV format file which should be made available to you by the school or organization of the project. Opticon Image Matching requires an Opticon Scanner to be assigned to each camera setup being used at a shoot. (Please note: Opticon OPN-2004 Portable Scanners are sold separately – your ACI Account Consultant for details and assistance.)
OPS Opticon Image Match service is fully integrated with our OPS Online Prepay and Batch/Proof services for a smooth and easy capture to print workflow. OPS’s Opticon Image service also supports a combination of Online & Paper Envelope PrePays.
Also Flow (by PhotoLynx) Opticon users will be interested to know that OPS’s Opticon systems are fully compatible with Flow. They can now utilize OPS’s PrePay Package field export into Flow or order submission, along with importing your matched images and subjects into OPS. By utilizing OPS’s import and export capabilities Flow studios will be able to take advantage of our commission free e-commerce and email marketing campaigns. Please contact your ACI Studio Consultant or ACI Customer Service for information on acquiring a Flow license and setup assistance.
To set up an Opticon Image Match project, login to your OPS administration page and Click on Projects > then click on the Add a Project button just below the menu bar.
Next complete the Add a Project form as seen below. This project is being set up for Batch Orders with an Opticon Image Match project workflow. Contact your Studio Consultant or Customer Service if you have any questions regarding the correct setup option you will need for your project. Also please do not forget to Click on the Save button when you are finished.
1. Adding Data to Your Opticon Image Match Project
Importing Your School Data
School data typically include Last and First Name Columns (it's important that they are in separate columns), Grade, Student ID, and Teacher or Home Room. OPS only accepts .CSV files for importing, as a result we recommend you request a .CSV format Student List from your school. Your school may send you an Excel .Xls file instead of an .CSV file, if they do it’s not a problem as .Xls files can be converted to .CSV files easily. We also recommend you get as much data info as possible, especially email addresses so you can take advantage of OPS’s email marketing campaigns to your student’s parents for reorders.
(Note! If shooting Group Photos are required for your school project, please be sure to review our Auto Group Matching instructions below BEFORE uploading your project data.)
Sample School Data Columns
Login to your Project and Click on the Subjects Tab > and then the Subject Action Dropdown Arrow > In the drop-down window select the Add / Merge Subject Data Only line.
Important Note! Your Project’s Data can only be Imported once. If you need to add or correct your project’s data, we strongly recommend you reference our Appending Your Data instructions first.
After clicking on the Add/Merge Data Line an Upload Data CSV Window will open, Click On> the Choose File Button and then navigate to and Select the .CSV Data File you are using for this project. After you have selected your file, Click On the Upload File Button. (Note your data file must be in a .CSV format file.)
A new Map Fields window will open and must be confirmed before your .CSV file can be uploaded. If your .CVS file headers match the OPS fields your data will map automatically. However, if they do not match it is especially important for you to click on the drop-down arrow next to the field name to match your .CSV Data columns to OPS’s.
Please note: Passwords are an integral part of OPS’s ability to deliver individual password protected galleries to your client’s. If your data does not contain a Password column with data, the OPS software will automatically assign a password to each subject line required. Requesting Passwords via OPS is easy, simply click on the drop-down arrow in the Password Box and select the Generate Passwords line. Doing this will enable OPS to create a password for each subject’s gallery.
After Mapping all your data fields, Click on the Import Data button.
As soon as all your images are imported into OPS, your Subjects Window will open displaying a list of the data you just imported into OPS. In the image below you can see the first and last names along with the New OPS Password Generated for you (if requested) as well as each Student’s ID and Grade.
2. Printing Your Opticon Bar Codes
Go to your project’s Subjects Tab and click on the Subject Actions drop down arrow. > Once the Subject Actions window opens, Click on the QR Codes / Barcodes line.
When your Subject Action Page opens, Click on the Format Drop Down Arrow to select the type of page format you would like to print out. The Sort and Filter Buttons on the left side of the page will allow you to print your data in the exact order you require for your project. (Note you can also Download a .CSV file of this data if you need to print out a custom format using Avery Printing software.)
You can print out 30-Up Barcode Output directly from OPS or if you need a custom Barcode design you can download your CSV file at Subject > Subject Actions > Barcodes > Formats >and then Download CSV. Next login to Avery.com (See link below) and follow the online instructions on their Design and Print Service. https://www.avery.com/software/design-and-print/
3. Shooting an OPS Opticon Image Match Order
Opticon Scanner
Use Opticon Format Barcode to clear scanners before beginning a new project …. Use Sync Scan barcode to sync the scanner with the camera.
Sync scanner and camera
Scan ‘Sync Scan’ barcode …. Note: It is critical that you shoot your “Sync Image” within 2 seconds after the SYNC Barcode is Scanned. Failure to shoot your SYNC image within 2 seconds of scanning could lead to mismatched images. If you aren’t sure you fired your camera within two seconds, you can repeat the SYNC after clearing your Scanner and Deleting the first SYNC image. (Tip: Turn Off your Auto Focus before shooting your SYNC Image to ensure your camera fires immediately. (Don’t forget to turn it back on.)
Photograph subjects
Scan first subject barcode / photograph subject image(s)
All images taken after the scan belong to that scan.
Scan second subject barcode which ends image being assigned to previous scan / photograph next subject’s image(s)
NOTE: Each subject needs to have their own barcode…add ‘Walk Up Data’ to your csv in advance of importing data anticipating students will need to be photographed that are not in original data
4. Post Photography
Connect the scanner to your computer with the cord that came with the scanner.
Find the ‘scanner drive’ / open it
This is what the scan looks like. First one is the sync scan…all that follow are subject scans before they are photographed.
Place the Scanned.txt file in a folder along with all the images that are to be imported into OrderPix…INCLUDING THE SYNC SCAN IMAGE. Note: you may have taken multiple images of each subject. You can cull images prior to this folder but the images finally placed in this ‘to be imported folder’ will be matched with data in the OrderPix project.
Import images into OrderPix project.
Browse to scan file / image folder for the SCANNED.TXT file and the Sync Scan jpg
Choose ‘Upload Opticon Data’ button.
Green bar indicates ‘Scan data was added.’
At the bottom of this screen, Select Image files to upload.
Now Browse out for the images to be uploaded.
NOTE: Do not select the Sync Scan Image…only the subject images
Next select the Image Processing Services you want applied to your image files.
- Perfectly clear
- Global Color Correction
- Individual Color Correction - $0.10 per file
Then please remember to Update Project Settings.
Start Upload
When your upload is completed, your Images will be matched to their subject data.
After your images have been posted, we recommend you click on the Login button for 2 to 3 subjects so you can check out how the images look from the consumer perspective.
Auto Matching Groups/Classes, or Teams to Individuals
If your Opticon project requires Matching Individual Images to Groups or Classes, we recommend the following steps to ensure OPS will automatically match your Group/Class Photos to each child correctly.
Typically, the school or organization you are photographing will have the Grade, Homeroom, Teacher, or Team names already entered in the Excel file they give you before your shoot. It is important you identify which field name will be photographed for the project’s group images so you can plan accordingly. If the group names are not included as part of the data the school sends to you, we recommend you ask the school for a new Excel File with the group information field included. Doing this ahead of time will save you time and stress from having to match up your group photos manually after the shoot.
Recommended Workflow for Auto Group Matching
Recommended Workflow for Auto Group Matching
The sample school data below displays normal school shoot data with the Teacher’s Column being used for the Group Names. After shooting your group photos, you must re-name each Group Image file to the same as the file names you entered in the Group Image column in your .CSV file. In the example below the Teachers names (with a .jpg extension) were entered into the Group Image column, as a result you must rename your Group Image file names so that they match the names in your project's .CSV file. (Important! Each file must have a .jpg at the end.)
In the data sample below, the School Project has been sorted by Teacher’s names. The Group file names are named the same as all the Teachers. Sorting and naming your Group’s in this manner will insure each child will be matched up with their group photo automatically by the lab when your orders are printed.
This method will also work if your school is using Grades or Home Rooms for their Group Photos. In the Group Name Field, simply re-name your Image files 005.jpg for grades or 0191.jpg for Home Rooms to get the same results. (Window & Mac users should always pad their number filenames with at least two zero so your files sort in the correct sequence, i.e., 001, 002, 003, etc. Projects with over 999 files should use three zeros i.e., 0001, 0002.)
(Note: If you are an inexperienced Excel user, check out this YouTube Video on Filling Down Column Data: Auto Fill Data.)
After you are finished including your Group Image files names to your School’s .CSV file, you can now proceed to the Adding Data to Your Opticon Barcode Project, located on your Project's Subjects Page > Subject Actions > Drop Down Arrow > Add / Merge Subject Data Only.
When you have completed uploading both your Individual and Group Image files, your project Subject Page will display both the individual and group files in the appropriate student galleries.
Comments
0 comments
Please sign in to leave a comment.