
Getting Started
Login to your OPS account admin page and click on your Project’s Options and then the Tags Link located on the Tab line.
Now in the bottom Image Tab window Click on the Image Tags Link.
In the next window Click on the Add an Image Tag button.
The Image Tag options window will now open, notes on how to use each option can be found in each option section. The setup example below is for a High School Senior Yearbook Tag.
Now on the New Tag Link click you just created, Click on the Apply button to review and activate your new tag on the required projects. (See sample below.)
The Apply Image Tag to Projects window will open so you can activate your newly created tag on all or selected individual projects. Simply click on the project you want to have your tag active.
(Note: Your tag will not be active and available if you do not complete this step)
Congratulations, your Newly Created Image Tag is now available on your designated projects! We recommend you double check your project’s consumer side to make sure it’s displayed as you expected. Also don’t forget if you’re logging in as a client you must use your client’s email address in order to be able to see your tag(s).
Downloading your Tagged Images Report and Images
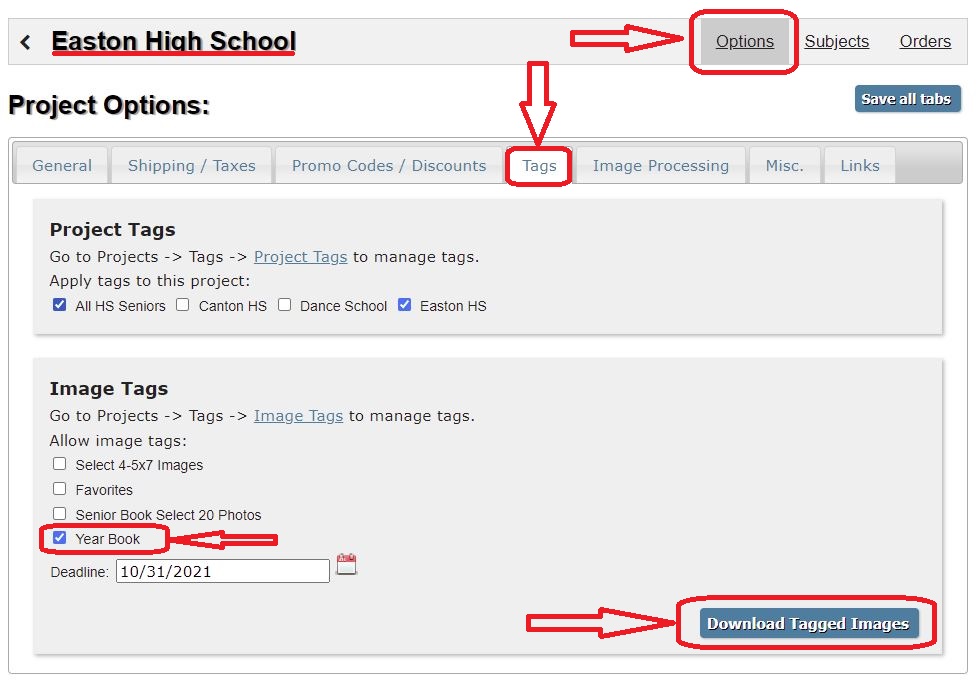
You can download a Tag report of any project by simply logging into your project’s Option page and then clicking on the Tags tab. Next in the Image Tags section Check-Off the Project’s Name you wish to download a report from.
Now click on the Download Tagged Images button to complete your report request.
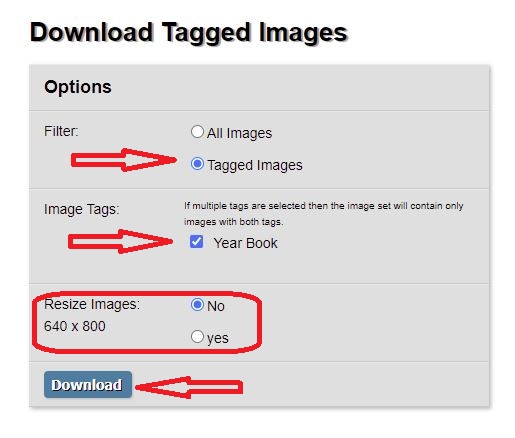
A Download Tagged Images Options Window will open. Select the Filter and Image Options you require and then Click on the Download button. OPS will create a .CSV file report of your project’s tagged subject’s name and the file number selected. Also a Full size or a 640x800 reduced size tagged image file of each tagged subject will be downloaded as well.
Comments
0 comments
Please sign in to leave a comment.